I'd like to mention that in creating the pool and walls, a lot of thought went into what was going to look good on the face of both. I knew I wanted a cobblestone look but to use real cobblestones would have been impossible because of the thickness and the cost. I did a lot of searching on the internet and found your product and thought it would be perfect! My boyfriend thought I was crazy when I suggested using these because of the quantity we would need but I said it was the only thing that could work. We made them throughout the winter and by spring we had 500 which was enough for the pool surround. When that was complete we made the balance of what we needed for the walls. All together we made about 1000 stones. I think in total we spent about $200 for all the materials (molds, dyes and concrete). Other advantages we found was being able to create the colors needed with the dyes, being able to control the thickness of the stones and the ease of applying them... (even to a round structure). There's an old cobblestone wall that I drive by everyday on my way to work. And while working on this project I used to look at it and think "that's exactly how I want the walls to look when we're done". And sure enough they do!
Thanks for a great product!
Will look forwarding to seeing the page on the website and getting everyone to vote! It would be so good to win the prize and then we could start building the outdoor kitchen -which of course will have the cobblestone facing.
Hyde Park is right outside of Boston and if there were no trees to the left of us we'd have a really great view of the city. When you look directly across it's a view of Quincy. On the 4th of July it's amazing with all the fireworks going off!
Thanks again for a great product and having the contest
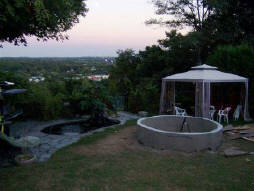
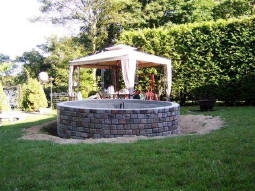
Hi, here are the pictures of a project we did using your Cobblestone molds. The entire project was done by hand:
1. We built a form for the pool and poured the concrete in the fall.
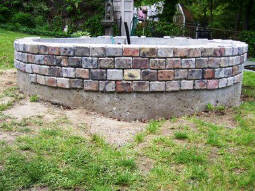
2. We spent the winter making the cobblestones with the 4x6 Cobblestone Molds. (#CS-0406 Castle Stone)
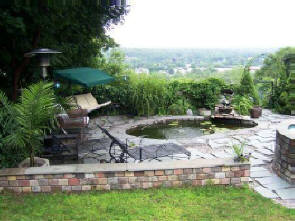
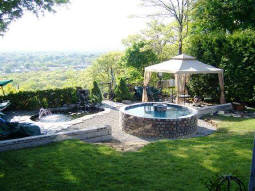
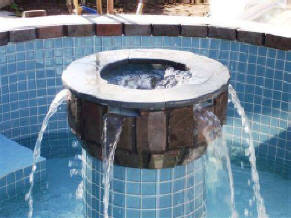
3. In the spring the stones were adhered with mortar to the exterior of the pool, the tile line and fountain bell.
4. The dividing walls running across the yard were constructed with concrete blocks and the stones were adhered with mortar.
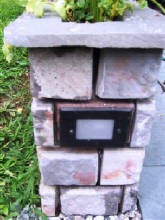
We also inserted a low voltage lighting unit (photo below) into two of the molds before adding the concrete so that when they cured the stone could then be adhered with the lighting unit already installed. These were put on the ends of the walls to light the walkway. All that's left to do now is mortar in between the stones!


BETH CUMMINGS FOUNTAIN, RETAINING WALL BACK YARD GARDEN PROJECT
VISIT OUR OTHER WEBSITES BELOW FOR ADDITIONAL INFORMATION
Use the links below to learn more about our concrete stone, tile, brick, paver, cobblestone, and other molds, as well as our concrete colors and colorants, concrete stains, mold release, sealers, and more on this website.
WANT TO BE KEPT UP TO DATE ON OUR PROMOTIONS
Please complete the following information to receive our Quarterly Newsletters. You will be asked via email to confirm your sign-up.
WE PROMISE... YOUR EMAIL WILL NOT BE SHARED WITH ANYONE.
Pool with Fountain, Retaining Wall and Garden Project Made with Manufactured Stone
by Beth and Brian - in Hyde Park, a Suburb of Boston, MA
$500 Shopping Spree